In this article, I present a collection of practical programming solutions tailored to cybersecurity challenges from HackTheBox. It focuses on coding-driven CTFs, especially those that require careful parsing, algorithmic logic, or exploit proof-of-concepts. The challenges I solve in this post are retired challenges and are listed below:
- HackTheBox Threat Index
- HackTheBox Oddly Even
- HackTheBox Reversal
- HackTheBox Addition
- HackTheBox Triple Knock
- HackTheBox MiniMax
- HackTheBox Honeypot
- HackTheBox BlackWire
- HackTheBox Insane Bolt
- HackTheBox Ghost Path
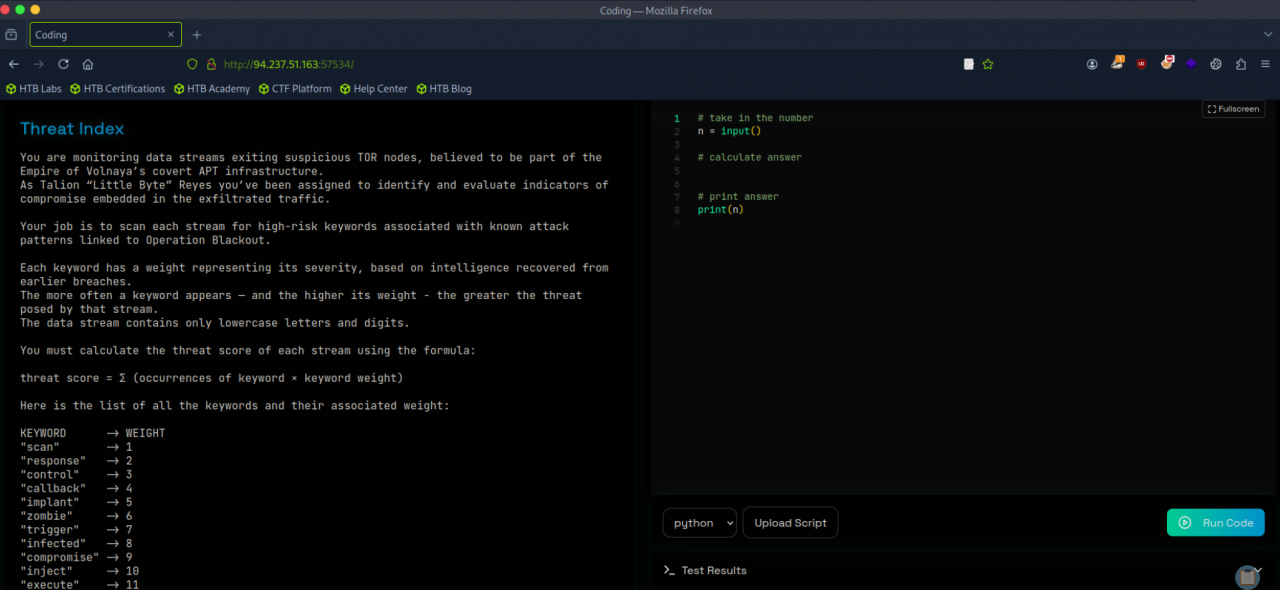
HackTheBox Threat Index Description
Volnayan APTs are exfiltrating data through TOR nodes, embedding attack signals in plain sight. Your job is to scan each outbound stream and identify known malicious keywords linked to Operation Blackout. Each keyword has a threat level — the more hits you find, the higher the danger. Analyze the stream, tally the signals, and calculate the overall threat score.
Walkthrough
We’ll solve this problem using Python3. To start, we’ll transfer the provided keywords and their corresponding weights into a dictionary for easy lookup.
KEYWORD_WEIGHTS = {
  "scan": 1,
  "response": 2,
  "control": 3,
  "callback": 4,
  "implant": 5,
  "zombie": 6,
  "trigger": 7,
  "infected": 8,
  "compromise": 9,
  "inject": 10,
  "execute": 11,
  "deploy": 12,
  "malware": 13,
  "exploit": 14,
  "payload": 15,
  "backdoor": 16,
  "zeroday": 17,
  "botnet": 18,
}
Next, we’ll read the input stream into a variable called data and initialize a variable ans to 0. This variable will store the final calculated threat score.
n = input()
ans = 0
Then, we’ll loop through each keyword and its weight from the dictionary. For each keyword, we’ll count how many times it appears in the data and multiply that count by its weight, adding the result to ans:
for keyword, weight in KEYWORD_WEIGHTS.items():
    keyword_count = n.count(keyword)
    ans += keyword_count * weight
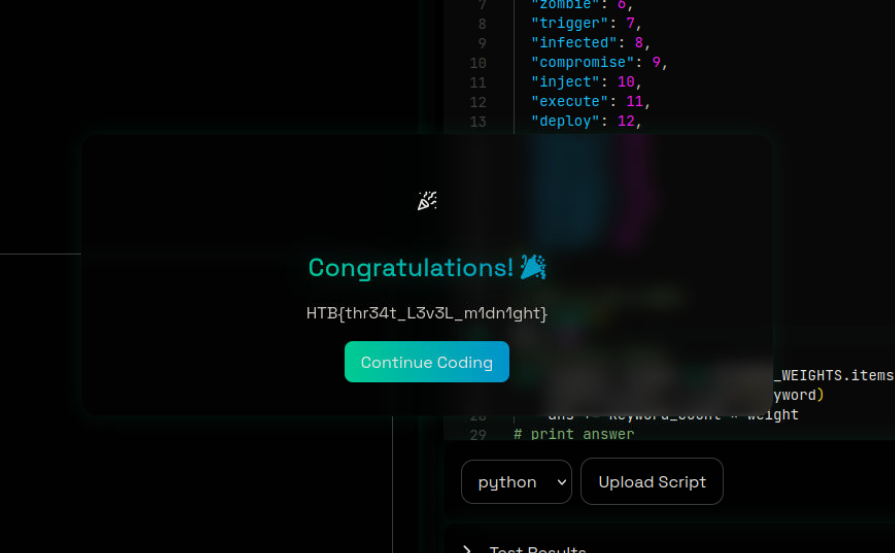
Finally, we print the result, which gives us the flag:
print(ans)
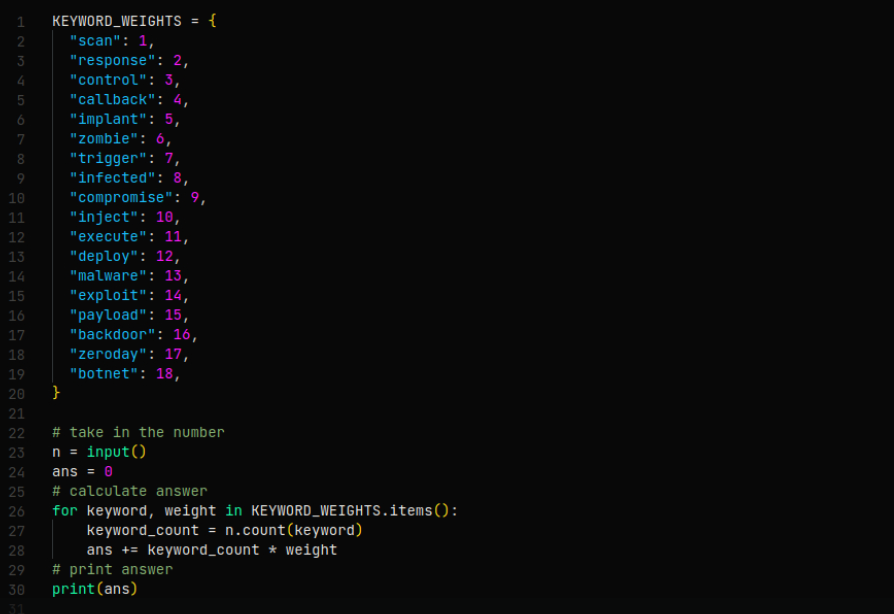
Full working script
KEYWORD_WEIGHTS = {
  "scan": 1,
  "response": 2,
  "control": 3,
  "callback": 4,
  "implant": 5,
  "zombie": 6,
  "trigger": 7,
  "infected": 8,
  "compromise": 9,
  "inject": 10,
  "execute": 11,
  "deploy": 12,
  "malware": 13,
  "exploit": 14,
  "payload": 15,
  "backdoor": 16,
  "zeroday": 17,
  "botnet": 18,
}

# take in the number
n = input()
ans = 0
# calculate answer
for keyword, weight in KEYWORD_WEIGHTS.items():
    keyword_count = n.count(keyword)
    ans += keyword_count * weight
# print answer
print(ans)
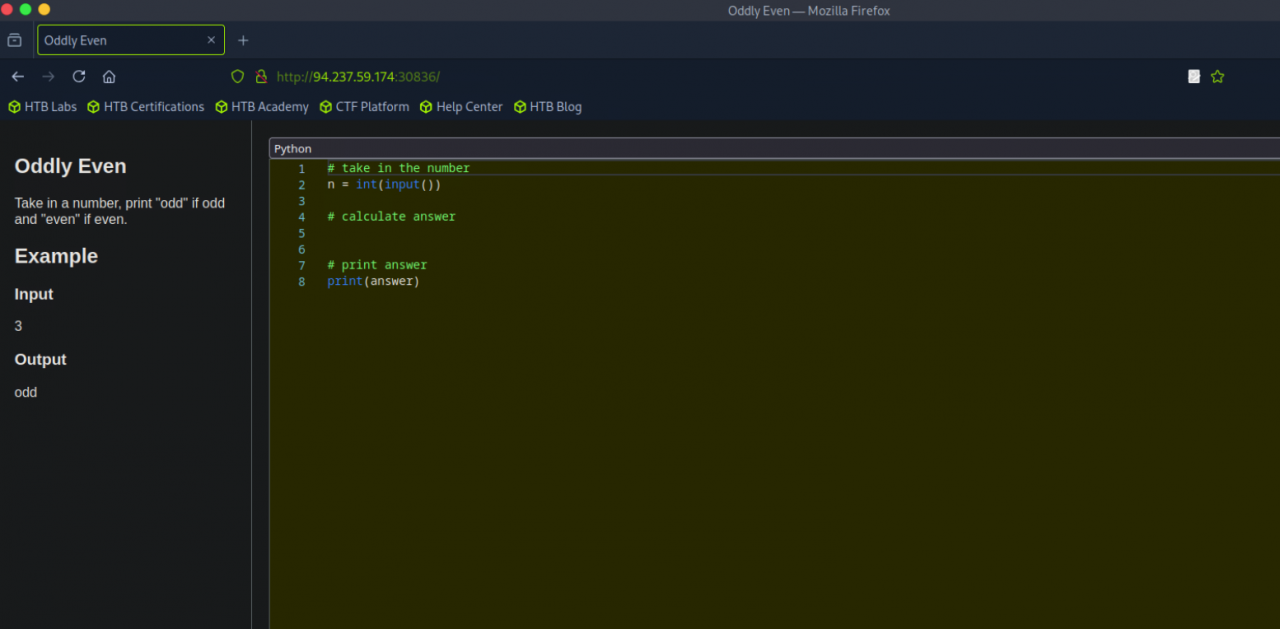
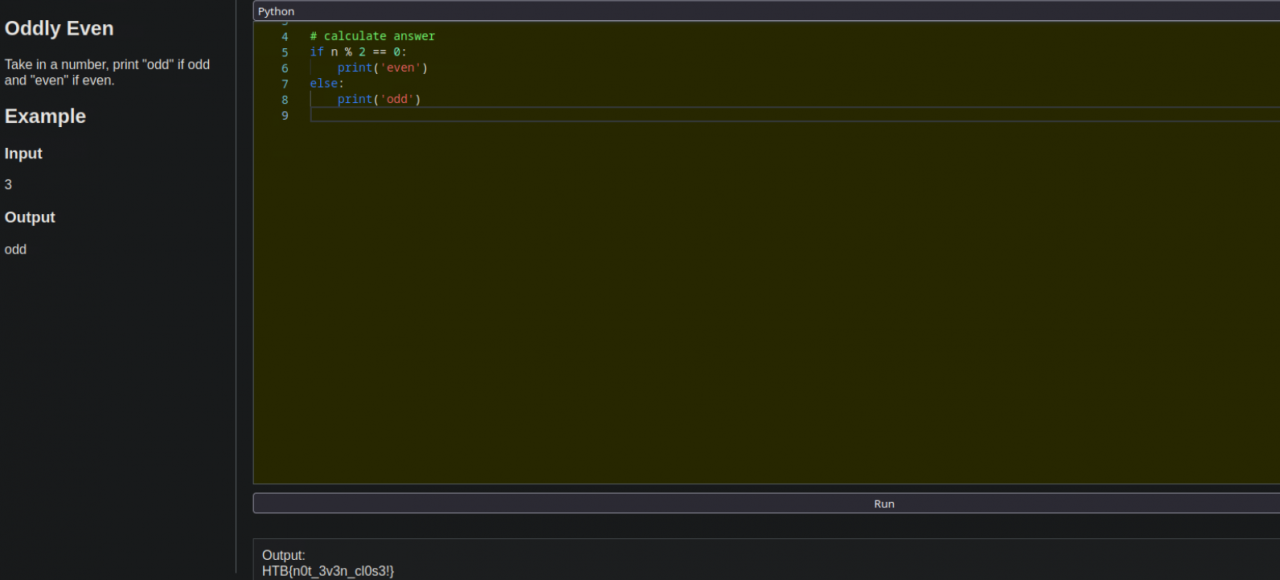
HackTheBox Oddly Even Description
The ghostly clock ticks strangely. Determine whether its chimes are even or odd to calm the restless spirits.
Walkthrough
- Get User Input
We start by asking the user to enter a number. The input() function reads the input as a string, so we wrap it with int() to convert it into an integer:
a = int(input("Enter a number: "))
- Determine Even or Odd
To check whether the number is even, we use the modulo operator %. This operator gives the remainder after division. If a number divided by 2 leaves no remainder (a % 2 == 0), it’s even. Otherwise, it’s odd:
if a % 2 == 0:
    print("even")
else:
    print("odd")
Example
If the user enters 7, the output will be:
odd
If the user enters 12, the output will be:
even
Why It Works
- Even numbers are divisible by 2 with no remainder (e.g., 0, 2, 4, 6).
- Odd numbers leave a remainder of 1 when divided by 2 (e.g., 1, 3, 5, 7).
This simple program is often one of the first exercises given to beginners because it teaches input handling, conditionals, and basic arithmetic operations in Python.
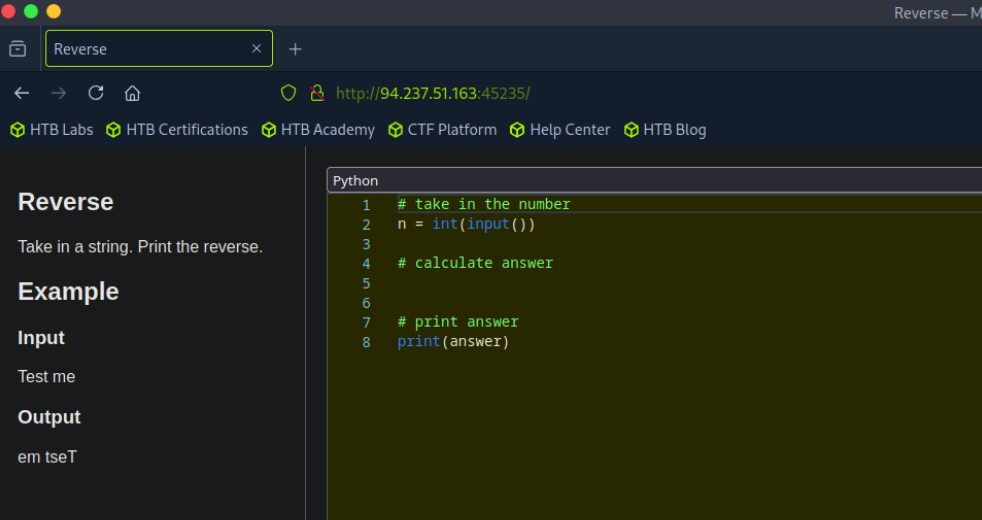
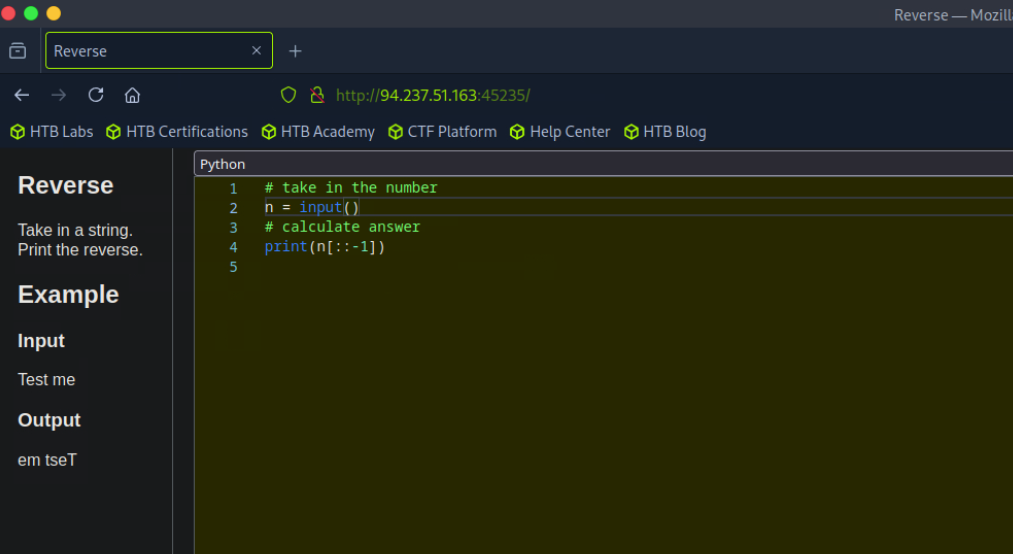
HackTheBox Reversal Description
A dark incantation was written backward in a spellbook. Reverse the cursed words to reveal their true meaning.
Walkthrough
Python strings are treated with several important properties and functionalities within the language.
Here’s how they are handled:
Iterable Nature: Python strings are iterables. This means they behave similarly to lists in many respects. Specifically, a string can be thought of as a list of characters. This property allows you to iterate over a string, character by character.
Slicing Capabilities: Strings support slicing, which allows you to extract specific parts of the string.
A slice can specify a start index, an end index (exclusive), and an optional step1. For example, string[0:5] would give the first five characters.
You can also specify a step, such as string[0:15:2], which would return every other character up to the 15th index.
A very common and effective way to reverse a string is by using a slice with a negative one step: string[::-1]. This directly returns the reversed string.
Interaction with reversed() Built-in Function: When the built-in reversed() function is applied to a string, it does not immediately return a new reversed string. Instead, it takes the string (which is an iterable) and turns it into an iterable or a generator.
This generator represents the individual characters of the string in reverse order.
The generator is memory efficient because it does not store the entire reversed sequence at once. It stores the characters “off in memory somewhere” and fetches them as they are needed.
If you attempt to print a reversed() object directly, you will see a representation of the generator object in memory (e.g., <reversed object at 0x…>), rather than the string itself.
Joining Generator Output with join(): To reassemble the characters from a generator (like the one produced by reversed()) into a new string, you typically use the join() method.
The join() method is called on a separator string (e.g., an empty string “”, a comma ,) and takes the generator (or any iterable) as its argument.
It then concatenates each item yielded by the generator, inserting the separator string between them. For instance, “”.join(reversed(input_string)) will effectively reverse the string.
Single-Use Nature of Generators: An important characteristic of generators, including the one returned by reversed(), is that they are single-use.
Once you loop through a generator or consume all its elements (e.g., by using join() on it), it becomes “exhausted”.
If you try to use the same generator object again after it has been consumed, it will not produce any more output and will likely fail. This is because the reversed object “once you loop through it once you’ve lost it it’s gone”.
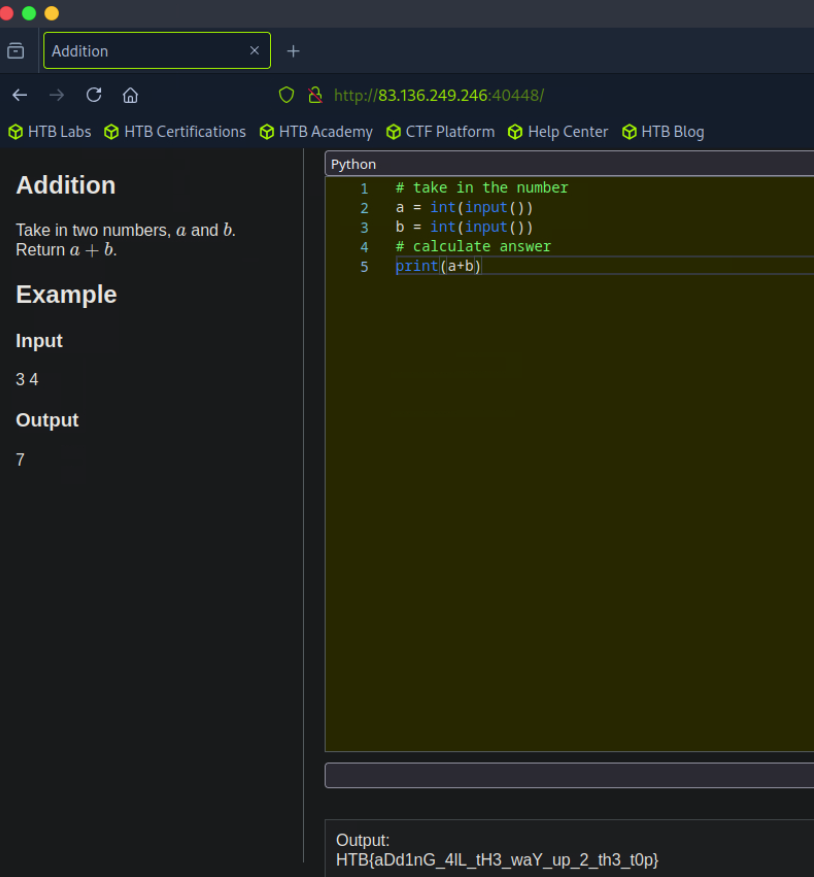
HackTheBox Addition Description
Two ancient runes hold hidden powers. Combine them to unlock the sum and reveal their secret.

Walkthrough
There are several methods for processing numerical inputs and performing arithmetic operations, specifically addition, within the context of the HackTheBox coding challenge:
Reading Inputs Separately and Then Summing: Initially, the challenge input was expected to be space-separated, like “3 4”, but it was discovered that the numbers are actually separated by a new line, for example, “3158” followed by “9260” on the next line.
One straightforward approach involves reading each numerical input on a separate line and converting it to an integer, then storing these in distinct variables.
For instance, X1 = int(input()) reads the first number, and X2 = int(input()) reads the second.
Once the numbers are stored as integers in variables, they can be easily added together using a simple arithmetic operation, such as res = X1 + X21. The result (res) is then printed.
Direct Addition Within the Print Statement: The process can be condensed by directly reading and converting the inputs to integers within the print statement. This eliminates the need for intermediate variables.
An example of this method is print(int(input()) + int(input())). This line reads the first input, converts it to an integer, reads the second input, converts it to an integer, adds them, and then prints the sum.
Using sum() with a Generator Expression for Multiple Inputs: A more advanced and concise method involves using Python’s built-in sum() function along with a generator expression.
This approach is demonstrated by sum(int(input()) for _ in range(2)).
range(2): This function generates a sequence of numbers (0 and 1), which means the subsequent int(input()) operation will be performed twice.
_ as a Variable Name: In Python, _ is a common convention for a loop variable when its value is not actually used within the loop’s body, signalling to the reader that the variable itself is not needed.
int(input()) for _ in range(2): This part creates a generator that reads a line of input and converts it to an integer two times. A generator is an iterable similar to a list, but it processes elements one by one, saving memory. Using round brackets () creates a generator, whereas square brackets [] would create a list1. The sum() function can efficiently handle either a list or a generator.
sum(…): This function then takes the numbers generated by the expression and adds them all together. The final result is then printed. This method effectively reads two lines, converts them to integers, and sums them up.
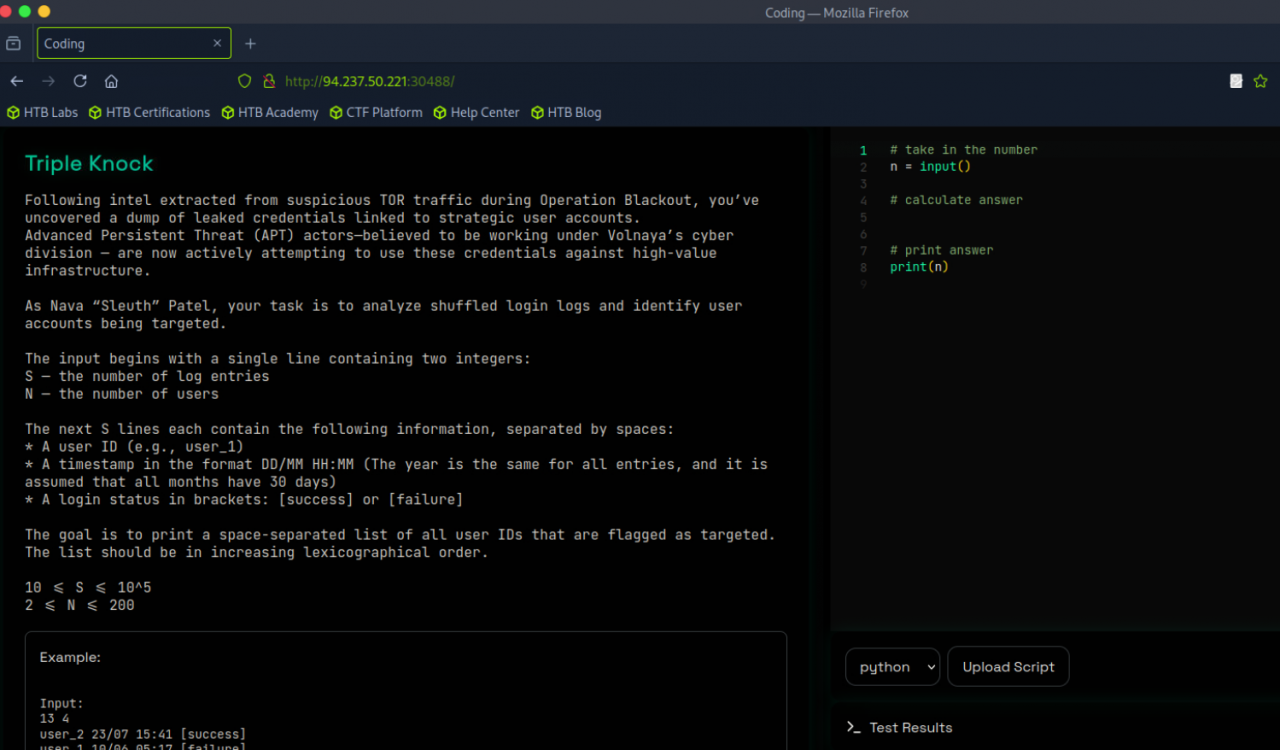
HackTheBox Triple Knock Description
Stolen credentials are now being used in coordinated login attempts across critical systems. As Nava “Sleuth” Patel, your mission is to analyze authentication logs and flag user accounts that are under active attack. Track suspicious access patterns, uncover brute-force attempts, and isolate the targeted identities before access is breached.
Walkthrough
We’re building a script to identify users who experience three or more failed login attempts within 10 minutes, which might indicate a targeted attack.
Step 1: Parse the Initial Input
We begin by reading two integers from the first line of input:
S: Total number of log entriesN: Not used in this portion of the code, but may be relevant in a larger problem context.
S, N = map(int, input().split(' '))
Step 2: Track Failed Login Timestamps
We want to keep track of failed login timestamps for each user. We’ll use a defaultdict to automatically initialize a list for each new user we encounter:
from collections import defaultdict

user_times = defaultdict(list)
Then, for each of the S log entries, we do the following:
- Skip the entry if it doesn’t mention a
"failure". - Extract the
user_idand the timestamp (which is the rest of the line up to the square bracket). - Convert the timestamp into total minutes since
01/01 00:00. - Store it in the dictionary under the appropriate user.
for _ in range(S):
    entry = input()
    if "failure" not in entry:
        continue

    entry = entry.split("[")[0].strip()
    user = entry.split(" ")[0]
    timestamp = " ".join(entry.split(" ")[1:])

    user_times[user].append(total_minutes(timestamp))
Step 3: Convert Timestamps to Total Minutes
We define a helper function total_minutes(ts) to calculate the total number of minutes from the start of the year (01/01 00:00) to any given timestamp. This makes it easier to compare times later.
def total_minutes(ts):
    # Parse date and time
    day_month, time = ts.split()
    day, month = map(int, day_month.split("/"))
    hour, minute = map(int, time.split(":"))

    # Convert to total days since 01/01 (assuming 30 days per month)
    days = ((month - 1) * 30) + day - 1  # 1/1 is treated as day 0

    # Final minute calculation
    return (days * 24 * 60) + (hour * 60) + minute
Step 4: Detect Users with Frequent Failures (Sliding Window Approach)
Now that all the data is collected, we scan through each user’s list of failure timestamps:
- Sort the timestamps in ascending order.
- Use a sliding window to check every group of 3 consecutive timestamps.
- If any group has all three failures within a 10-minute span, mark that user as “targeted”.
targeted = []

for user, times in user_times.items():
    times.sort()
    for i in range(len(times) - 2):
        if times[i + 2] - times[i] <= 10:
            targeted.append(int(user.replace("user_", "")))
            break
Note: We only extract the numeric part of the user ID (user_7 becomes 7) to simplify sorting.
Step 5: Output the Flagged Users
Before displaying the results, we:
- Sort the list of flagged user IDs.
- Format them back into
user_Xstyle. - Print them in a space-separated line.
targeted.sort()
print(" ".join([f"user_{ID}" for ID in targeted]))
Final Output
Once everything runs, the script will output a list of user IDs who had three failed login attempts within 10 minutes, in ascending numeric order. This is the final answer or flag you’re looking for.
Example
Given logs like:
user_1 01/01 00:00 failure
user_1 01/01 00:03 failure
user_1 01/01 00:09 failure
user_2 01/01 01:00 failure
user_2 01/01 01:30 failure
The output would be:
user_1
Because only user_1 had 3 failures within a 10-minute window.
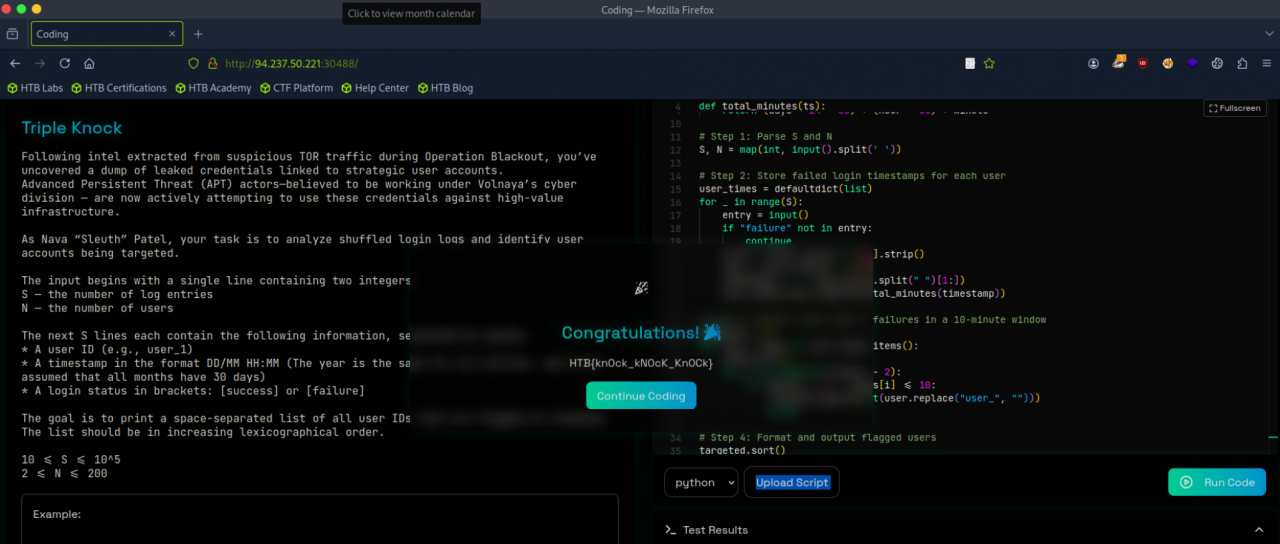
Full Working Script
from collections import defaultdict

# Helper function to convert timestamp to total minutes since 01/01 00:00
def total_minutes(ts):
    day_month, time = ts.split()
    day, month = map(int, day_month.split("/"))
    hour, minute = map(int, time.split(":"))
    days = ((month - 1) * 30) + day - 1  # Treat 01/01 as day 0
    return (days * 24 * 60) + (hour * 60) + minute

# Step 1: Parse S and N
S, N = map(int, input().split(' '))

# Step 2: Store failed login timestamps for each user
user_times = defaultdict(list)
for _ in range(S):
    entry = input()
    if "failure" not in entry:
        continue
    entry = entry.split("[")[0].strip()
    user = entry.split(" ")[0]
    timestamp = " ".join(entry.split(" ")[1:])
    user_times[user].append(total_minutes(timestamp))

# Step 3: Detect users with 3 failures in a 10-minute window
targeted = []
for user, times in user_times.items():
    times.sort()
    for i in range(len(times) - 2):
        if times[i + 2] - times[i] <= 10:
            targeted.append(int(user.replace("user_", "")))
            break

# Step 4: Format and output flagged users
targeted.sort()
print(" ".join([f"user_{ID}" for ID in targeted]))
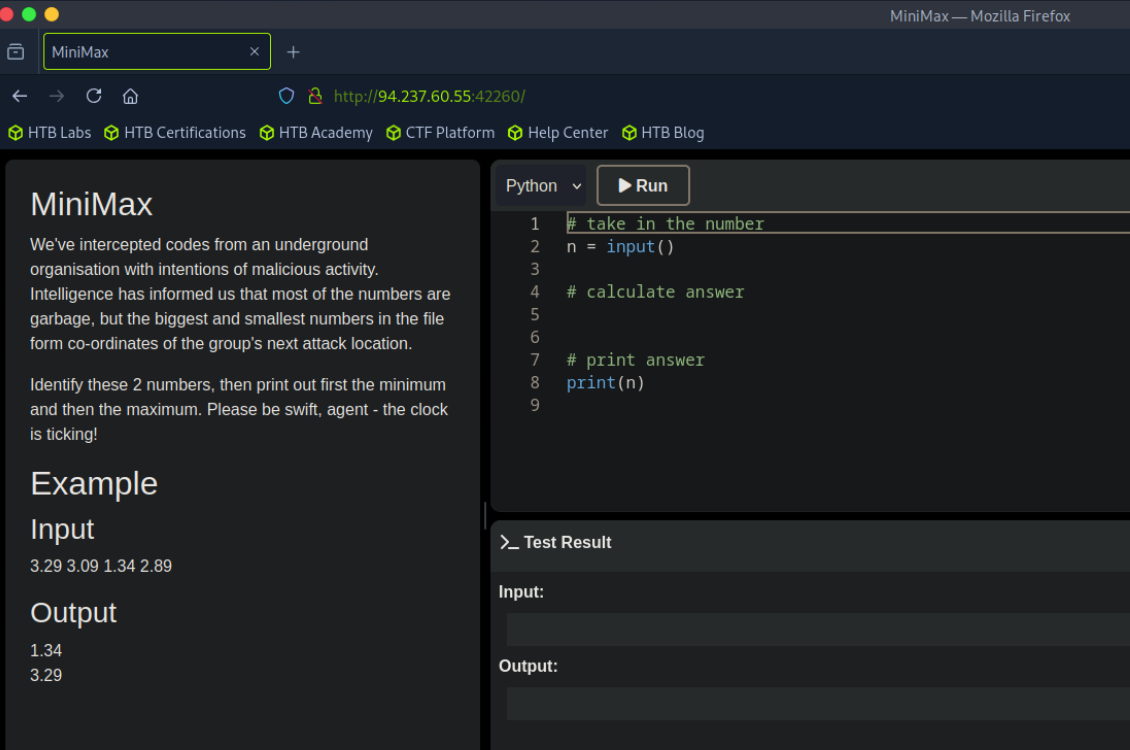
HackTheBox MinMax Description
In a haunted graveyard, spirits hide among the numbers. Can you identify the smallest and largest among them before they vanish?
Walkthrough
To extract minimum and maximum values in a Pythonic way from a string of numbers, the process involves two main steps: first, parsing and converting the input string into a list of numerical values, and
1. Parsing Input and Converting to Numerical List: The initial input is typically a single long string of numbers separated by spaces. To work with these numbers, they need to be split into individual items and then converted from strings to numerical types (like floats or integers).
Using a Generator Expression (Inline For Loop/List Comprehension): This method is considered very elegant and Pythonic. You first split the input string n by spaces to get a list of string numbers, and then use a generator expression (which can be wrapped in list() to create a list) to convert each string number to a float.
Example: nums = [float(x) for x in n.split()].
Using the map() Function: Another highly Pythonic approach is to use the map() function. The map() function takes a function (e.g., float) and applies it to each item in an iterable (e.g., the result of n.split()). Example: nums = list(map(float, n.split())). Similar to the generator expression, map() returns a generator object.
To enable multiple operations (such as finding both the minimum and maximum), it’s essential to convert this generator object into a list by passing it to the list() function. If not converted to a list, the generator will be exhausted after the first operation (e.g., finding the minimum), leaving nothing for subsequent operations (like finding the maximum).
2.Extracting Minimum and Maximum Values: Once you have a list of numerical values (nums), Python provides straightforward built-in functions to find the smallest and largest values.
min() function: To find the smallest number, simply call min(nums).
max() function: To find the largest number, call max(nums).
These methods (using min() and max() on a list generated via map() or a generator expression) are “so much more elegant” and “the more Pythonic way” compared to manually looping through the numbers and tracking minimum and maximum values. Although an explicit for loop with manual tracking of min and max values would also work, it is less elegant and generally not considered the preferred Pythonic approach for this task1.
The input numbers are initially received as one long string. The source mentions that when the program is run, “there’s an input it’s going to be a bunch of numbers”. To confirm its type, a check (type of n) reveals that the input n is indeed a string. This string contains numbers separated by spaces.
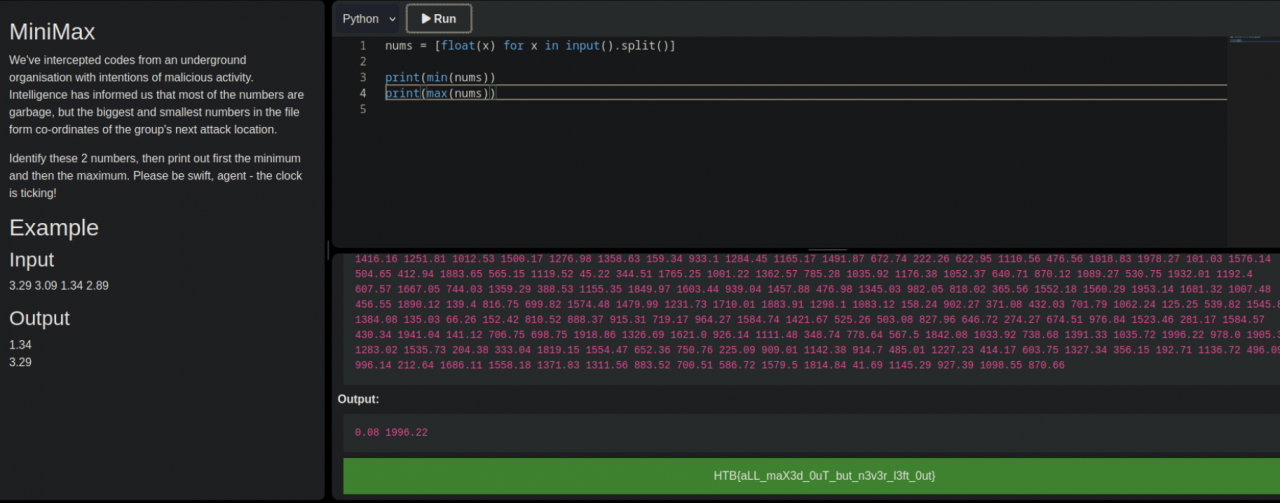
Full Working Script
nums = [float(x) for x in input().split()]

print(min(nums))
print(max(nums))
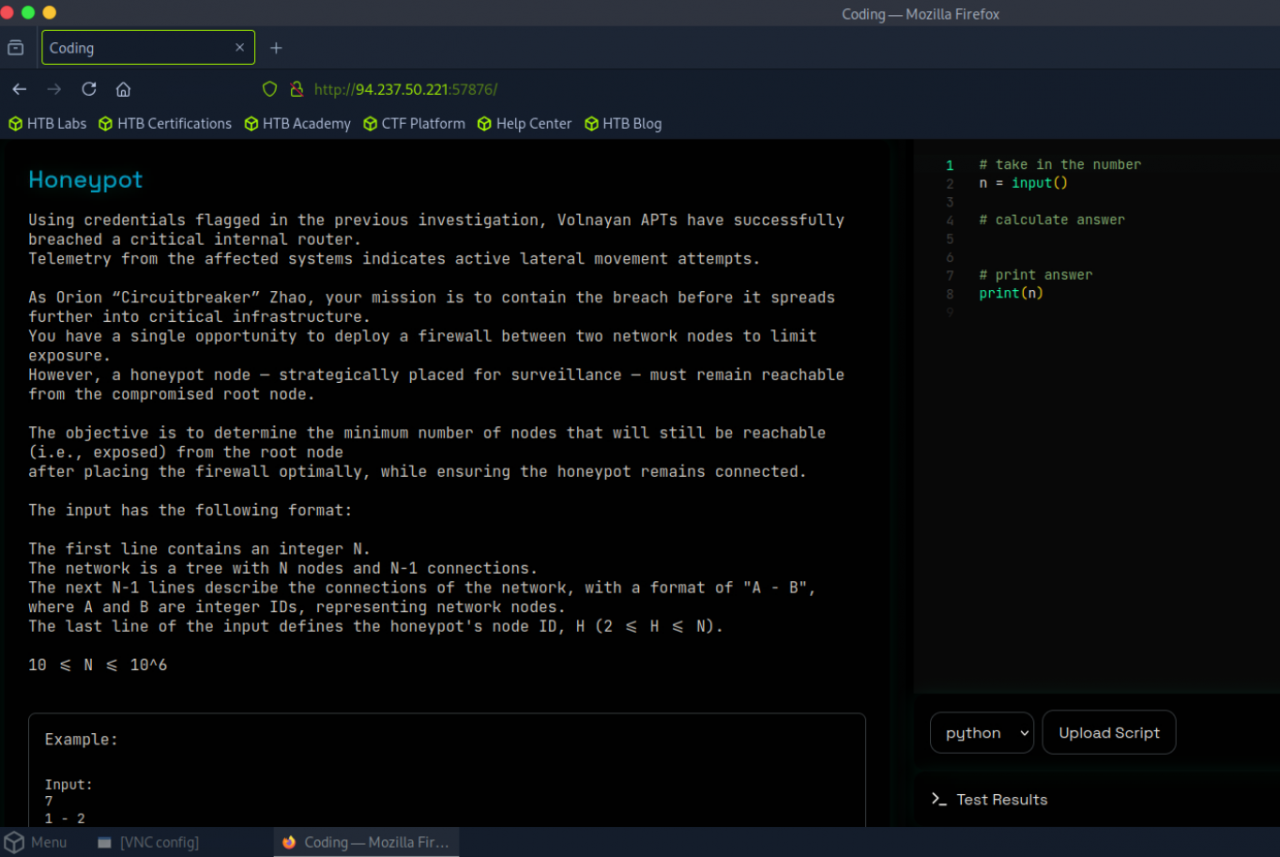
HackTheBox Honeypot Description
A Volnayan breach has reached deep into your network, with lateral movement already underway. As Orion “Circuitbreaker” Zhao, you must deploy a firewall to isolate the threat — but the honeypot must remain connected for surveillance. Choose the cut point carefully: the fewer nodes exposed, the better your containment.
Walkthrough
We’re working with a tree-structured network of nodes and want to strategically place a firewall to isolate the largest part of the network that does not contain a honeypot. The goal is to cut off as many nodes as possible without disconnecting the honeypot from the main system.
Step 1: Parse the Tree Structure Efficiently
We’ll first build the tree using an adjacency list, which is more performant than using custom Node classes, especially when dealing with large graphs.
from collections import defaultdict, deque

n = int(input())  # Number of nodes in the network
tree = defaultdict(list)

# Read edges and populate adjacency list
for _ in range(n - 1):
    p, c = map(int, input().split(" - "))
    tree[p].append(c)
    tree[c].append(p)

# Read the honeypot node ID
honeypot = int(input().strip())
Step 2: Set Up Helper Lists
We initialize three important lists:
parent: Tracks each node’s parent to avoid revisiting nodes during traversal.contains_honeypot: Marks whether the subtree rooted at a node includes the honeypot.subtree_size: Stores the size of each node’s subtree for later evaluation.
parent = [0] * (n + 1)
contains_honeypot = [False] * (n + 1)
subtree_size = [0] * (n + 1)
Step 3: Depth-First Search (DFS) Using a Stack
We simulate DFS iteratively using a stack to avoid Python’s recursion limit on deep trees. We also build a post-order traversal, which helps process children before their parent, perfect for bottom-up calculations.
post_order = []
stack = deque([1])  # Start DFS from node 1 (assumed root)

while stack:
    node = stack.pop()
    post_order.append(node)
    for neighbor in tree[node]:
        if neighbor == parent[node]:
            continue
        parent[neighbor] = node
        stack.append(neighbor)
Step 4: Aggregate Subtree Data
Now we process nodes in reversed post-order to compute:
subtree_size[node]: Total number of nodes in the subtree rooted atnode.contains_honeypot[node]: Whether the subtree contains the honeypot.
This helps us evaluate firewall cut options in the next step.
for node in reversed(post_order):
    subtree_size[node] = 1  # Count self
    contains_honeypot[node] = (node == honeypot)
    for neighbor in tree[node]:
        if neighbor == parent[node]:
            continue
        subtree_size[node] += subtree_size[neighbor]
        contains_honeypot[node] |= contains_honeypot[neighbor]
Step 5: Greedy Firewall Placement
We now look for the largest subtree that can be isolated without affecting the honeypot. That means we want a subtree that:
- Has the biggest
subtree_size - Does not contain the honeypot
This is where we place the firewall. The final result is the number of nodes that can be isolated (i.e., total nodes - largest safe subtree).
biggest_subtree = 0

for node in range(1, n + 1):
    if subtree_size[node] > biggest_subtree and not contains_honeypot[node]:
        biggest_subtree = subtree_size[node]

# Final output: nodes we can safely cut off
print(n - biggest_subtree)
Example Output
If the tree has 10 nodes and the largest honeypot-free subtree has 6 nodes, the output will be:
4
Meaning we can safely isolate 4 nodes with a single firewall cut, without cutting off the honeypot.
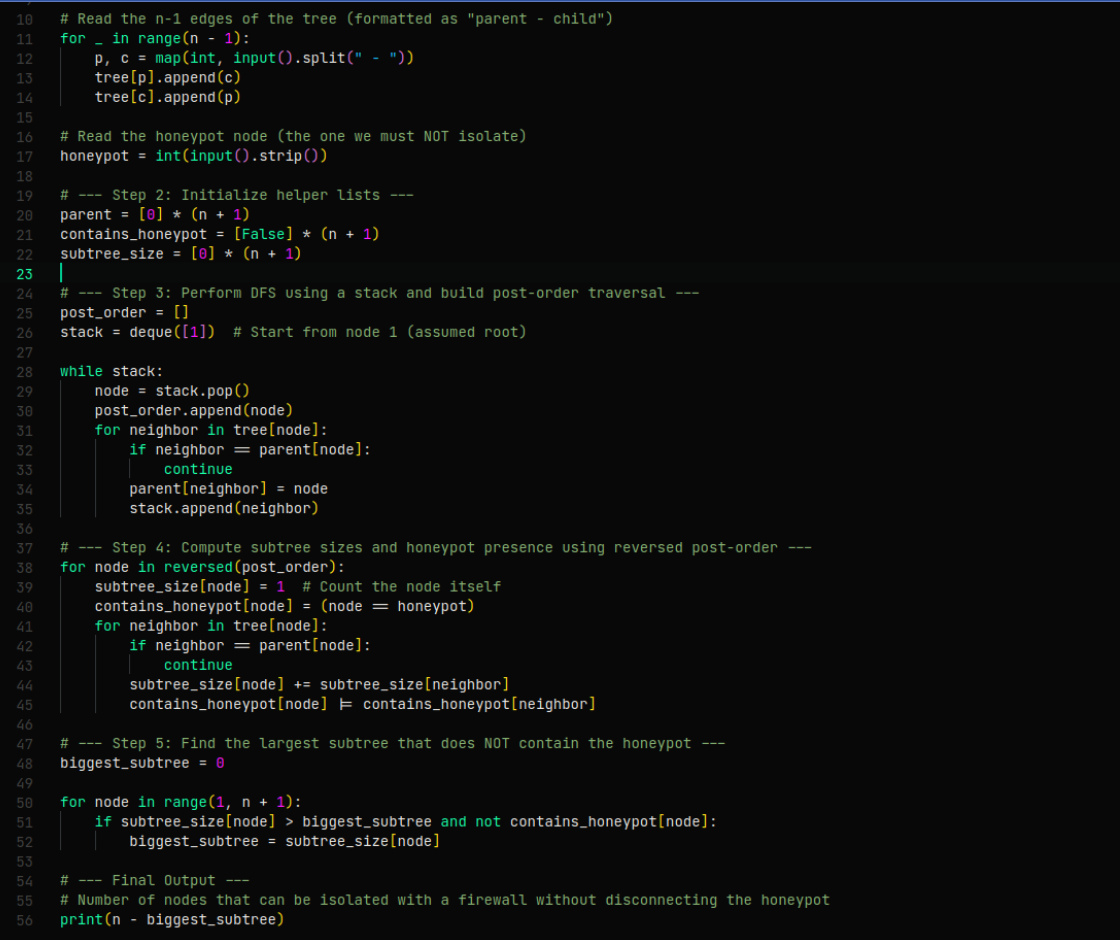
Full Working Script
from collections import defaultdict, deque

# --- Helper function to calculate subtree timestamps in minutes (not used in this version) ---

# --- Step 1: Read number of nodes and build the tree ---
n = int(input())  # Total number of nodes

tree = defaultdict(list)

# Read the n-1 edges of the tree (formatted as "parent - child")
for _ in range(n - 1):
    p, c = map(int, input().split(" - "))
    tree[p].append(c)
    tree[c].append(p)

# Read the honeypot node (the one we must NOT isolate)
honeypot = int(input().strip())

# --- Step 2: Initialize helper lists ---
parent = [0] * (n + 1)
contains_honeypot = [False] * (n + 1)
subtree_size = [0] * (n + 1)

# --- Step 3: Perform DFS using a stack and build post-order traversal ---
post_order = []
stack = deque([1])  # Start from node 1 (assumed root)

while stack:
    node = stack.pop()
    post_order.append(node)
    for neighbor in tree[node]:
        if neighbor == parent[node]:
            continue
        parent[neighbor] = node
        stack.append(neighbor)

# --- Step 4: Compute subtree sizes and honeypot presence using reversed post-order ---
for node in reversed(post_order):
    subtree_size[node] = 1  # Count the node itself
    contains_honeypot[node] = (node == honeypot)
    for neighbor in tree[node]:
        if neighbor == parent[node]:
            continue
        subtree_size[node] += subtree_size[neighbor]
        contains_honeypot[node] |= contains_honeypot[neighbor]

# --- Step 5: Find the largest subtree that does NOT contain the honeypot ---
biggest_subtree = 0

for node in range(1, n + 1):
    if subtree_size[node] > biggest_subtree and not contains_honeypot[node]:
        biggest_subtree = subtree_size[node]

# --- Final Output ---
# Number of nodes that can be isolated with a firewall without disconnecting the honeypot
print(n - biggest_subtree)
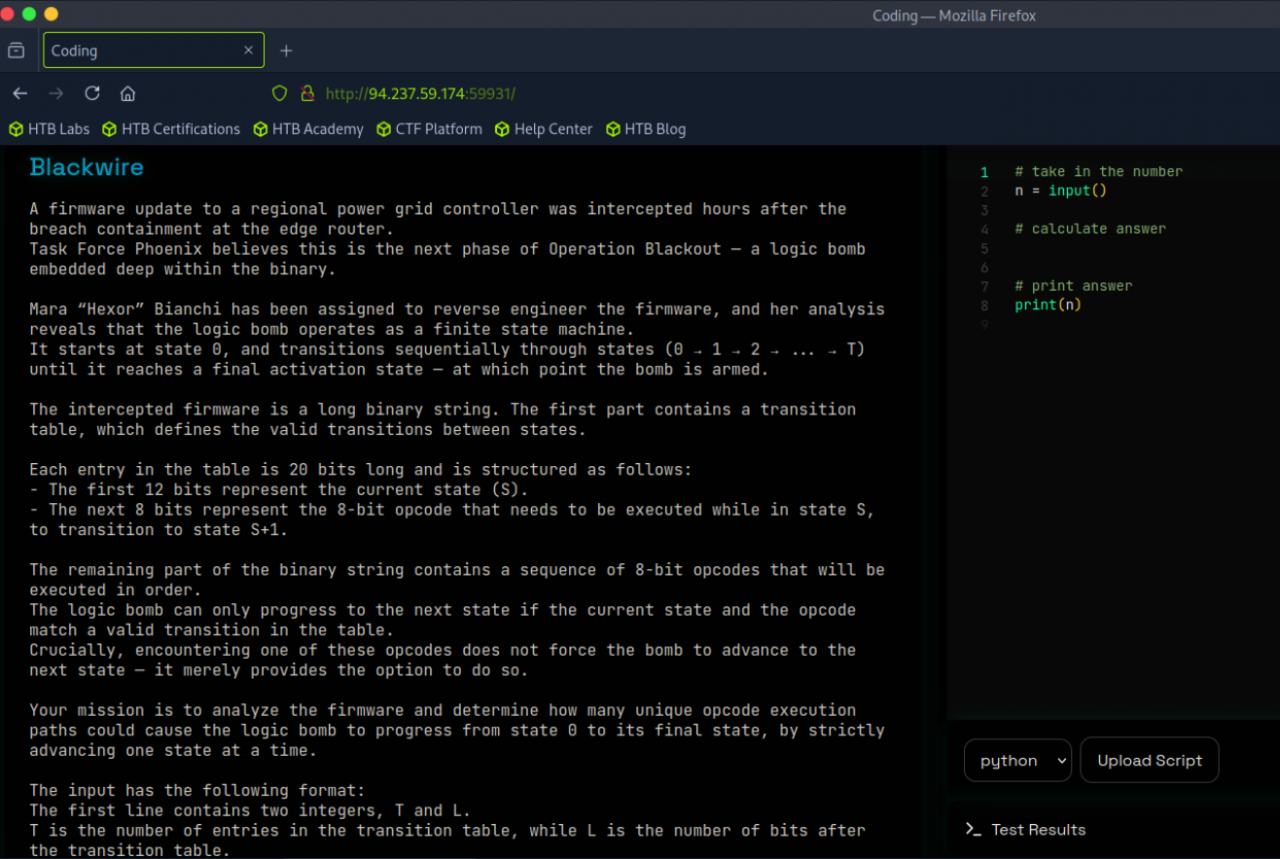
HackTheBox Blackwire Description
A corrupted firmware update hides a logic bomb buried deep within a regional power grid controller. As Mara “Hexor” Bianchi, you must analyze the intercepted binary and identify how many distinct execution paths could arm the payload. Each opcode matters — decode the state machine, and stop the bomb from reaching its final trigger.
Walkthrough
This script is built to solve a logic bomb challenge, where we analyze a stream of opcodes and determine how many valid ways we can traverse a state machine, based on predefined transitions.
Step 1: Parsing the Input
We begin by reading two integers from the input:
T: The number of transitions in the state machineL: The total length of the opcode execution stream in bits
import sys

T, L = map(int, input().strip().split(' '))
Step 2: Reading the Transition Table
Each transition is defined by:
- A 12-bit state (which acts as the index)
- An 8-bit opcode (the required instruction to move to the next state)
Since the transitions might not arrive in order, we initialize the transition table with placeholders (e.g., 0x00) and update the correct indices as we parse the input:
transitions = [0x00] * T
for _ in range(T):
    state = int(sys.stdin.read(12), 2)
    opcode = int(sys.stdin.read(8), 2)
    transitions[state] = opcode
➡️ After this step, transitions[state] = opcode means:
“If the machine is in state, it needs opcode to move to state + 1.”
Step 3: Parsing the Opcode Execution Stream
We now read the stream of opcodes that the program has executed. These are 8-bit segments, so we read the stream in chunks of 8 bits and convert each chunk into an integer:
opcode_exec_stream = []
for i in range(0, L, 8):
    opcode_exec_stream.append(int(sys.stdin.read(8), 2))

m = L // 8  # Total number of opcodes in the stream
Step 4: Understanding the Challenge – Dynamic Programming to the Rescue
What are we solving?
We’re asked to find the number of valid subsequences in the opcode execution stream that match the required state transitions.
What is a subsequence?
A subsequence is a sequence you can derive by removing some elements from the original sequence without changing the order.
Examples:
[A, B, D]is a valid subsequence of[A, B, C, D][C, A]is not a valid subsequence — the order is broken.
Why dynamic programming?
Because brute-force would check all combinations and explode in complexity (exponential time).
Dynamic Programming (DP) lets us solve smaller overlapping subproblems just once and store their results.
You can think of it as “caching progress” as you iterate.
Step 5: Setting Up the DP Table
We define:
dp_table[i][j]
This means:
How many ways can we match the first j transitions using the first i opcodes?
Initialization
There is always one way to match zero transitions , by skipping everything:
dp_table = [[0] * (T + 1) for _ in range(m + 1)]
for i in range(m + 1):
    dp_table[i][0] = 1
Step 6: Populating the DP Table
Now we fill in the table by checking, for each opcode and transition:
- If they match, we have two choices:
- Use the opcode →
dp[i-1][j-1] - Skip the opcode →
dp[i-1][j]
- Use the opcode →
- If they don’t match, we can only skip →
dp[i-1][j]
for i in range(1, m + 1):
    for j in range(1, T + 1):
        if opcode_exec_stream[i - 1] == transitions[j - 1]:
            dp_table[i][j] = dp_table[i - 1][j - 1] + dp_table[i - 1][j]
        else:
            dp_table[i][j] = dp_table[i - 1][j]
Step 7: Final Answer
If everything is implemented correctly, the value at the bottom-right of the DP table holds our final answer:
print(dp_table[m][T])
This number tells us how many different ways the logic bomb could have correctly triggered by matching the opcode transitions in the stream.
Full Script

import sys

# --- Step 1: Parse the input values ---
T, L = map(int, input().strip().split(' '))  # T: number of transitions, L: length in bits

# --- Step 2: Read transition table ---
transitions = [0x00] * T
for _ in range(T):
    # Read 12-bit state and 8-bit opcode
    state = int(sys.stdin.read(12), 2)
    opcode = int(sys.stdin.read(8), 2)
    transitions[state] = opcode

# --- Step 3: Read the opcode execution stream ---
opcode_exec_stream = []
for _ in range(0, L, 8):
    opcode = int(sys.stdin.read(8), 2)
    opcode_exec_stream.append(opcode)

m = L // 8  # Number of opcodes in the stream

# --- Step 4: Initialize DP table ---
# dp[i][j] = number of ways to match first j transitions using first i opcodes
dp_table = [[0] * (T + 1) for _ in range(m + 1)]

# There's exactly 1 way to match zero transitions (by skipping everything)
for i in range(m + 1):
    dp_table[i][0] = 1

# --- Step 5: Fill the DP table ---
for i in range(1, m + 1):
    for j in range(1, T + 1):
        if opcode_exec_stream[i - 1] == transitions[j - 1]:
            # Match: choose to use it or skip it
            dp_table[i][j] = dp_table[i - 1][j - 1] + dp_table[i - 1][j]
        else:
            # No match: skip only
            dp_table[i][j] = dp_table[i - 1][j]

# --- Step 6: Output the result ---
print(dp_table[m][T])
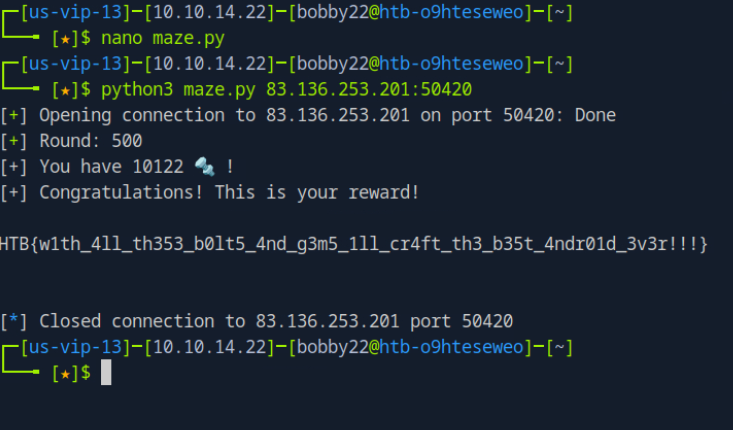
HackTheBox Insane Bolt Description
This insane scientist wants to craft the most powerful android in the world! Help him collect many 🔩 to achieve his goal. Also, he needs many to make it even more strong and powerful than any other android. Good luck adventurer!
Walkthrough
To successfully complete the Insane Bolt challenge, you need to collect 500 diamonds…. Alongside the diamonds, you also need to gather at least 5,000 bolts. The challenge involves solving multiple mazes, and you acquire one diamond per maze solved. The automated solution described in the sources is designed to loop repeatedly to solve the mazes until the goal of 500 diamonds is reached
The core strategy involves creating a script that loops through the challenge steps repeatedly, allowing a computer to perform tasks that would be tedious or impossible for a human to do manually.
Identifying Repetitive Elements: In the Insane Bolt challenge, the repetitive element is the need to solve 500 mazes to collect 500 diamonds and at least 5,000 bolts. Solving these mazes one by one manually would be extremely time-consuming and impractical.
Leveraging pwntools for Interaction: The pwntools library provides essential functions for interacting with remote services over a socket. The remote function is used to establish a connection to the challenge server (e.g., via IP address and port).
receive_until is crucial for reading incoming data from the server up to a specific prompt or pattern (e.g., to get the maze puzzle)….
sendline is used to send solutions back to the server in the required format.
Python for Logic and Automation Flow: The Python script sets up a while True loop to repeatedly execute the puzzle-solving process. This loop continues until the challenge goal is met or a specific condition (like receiving the flag) is triggered.
Data Parsing and Transformation: The raw data received from the server, often containing unicode or emoji characters, needs to be cleaned and converted into a usable format (e.g., ASCII characters) for programmatic processing. For instance, fire and skull symbols (which act as walls) are replaced with a ‘#’ (hash symbol), the bolt path with ‘p’, the diamond endpoint with ‘e’, and the robot start with ‘s’56. Spaces are also removed to simplify the maze representation.
Maze Representation: The cleaned data is then parsed into a structured format, such as a list of rows and columns, allowing the script to identify the start point, end point, and all traversable path spaces within the maze.
Algorithm Implementation: For finding the shortest route, Breadth-First Search (BFS) is implemented. BFS is suitable because it explores all possible paths layer by layer, guaranteeing that the first path found to the destination will be the shortest one.
▪A deque (double-ended queue) from Python’s collections module is used to manage the nodes to visit.
A visited set keeps track of locations already explored to avoid cycles and redundant computations, ensuring the shortest path is maintained.
The algorithm iteratively explores possible moves (down, up, left, right) from the current position, adding valid next steps and their corresponding paths to the queue.
Sending the Solution: Once the BFS algorithm finds the shortest path, the sequence of moves (e.g., “DLR” for Down, Left, Right) is encoded into bytes and sent back to the server using r.sendline(solution.encode()).
Receiving Results and Monitoring Progress: After sending a solution, the script waits to receive the server’s response, which typically confirms the collection of a diamond and bolts. This feedback allows the script to monitor its progress towards the 500-diamond goal. The output can be formatted for readability, such as stripping newlines and joining parts with spaces.
Robustness and Error Handling: The script includes assertions to ensure critical variables (like start and end maze points) are correctly populated before proceeding, which helps in debugging during development.
A try-except block can be used to catch potential errors like EOFError (End Of File error), which might occur if the server closes the connection unexpectedly. In such cases, the script can attempt to receive any remaining data (like the final flag) before exiting.
This robust design ensures that the automation can run for an extended period without crashing, effectively completing the hundreds of required iterations.
By combining pwntools for socket interaction with Python’s capabilities for data processing, algorithm implementation, and control flow, automated solutions can efficiently and reliably tackle repetitive challenge elements, transforming a daunting manual task into an automated triumph.
Full Script
#!/usr/bin/env python3

from pwn import log, remote, sys

# Movement mapping for right, left, down
movements = {
    (0, 1): 'R',
    (0, -1): 'L',
    (1, 0): 'D',
}

# Global variable to store the correct path to the diamond
final_path = ''


def dfs(position, maze, visited, path=''):
    """
    Perform DFS from the current position to find a path to the diamond (💎),
    avoiding traps (☠️) and previously visited cells.
    """
    global final_path

    rows, cols = len(maze), len(maze[0])

    # Out-of-bounds check
    if not (0 <= position[0] < rows and 0 <= position[1] < cols):
        return

    # Stop if diamond found and path not yet recorded
    if maze[position[0]][position[1]] == '💎' and final_path == '':
        final_path = path
        return

    visited.add(position)

    # Explore Down, Left, Right
    for move in [(1, 0), (0, -1), (0, 1)]:
        new_pos = (position[0] + move[0], position[1] + move[1])

        if not (0 <= new_pos[0] < rows and 0 <= new_pos[1] < cols):
            continue
        if new_pos not in visited and maze[new_pos[0]][new_pos[1]] != '☠️':
            dfs(new_pos, maze, visited.copy(), path + movements[move])


def main():
    global final_path

    if len(sys.argv) != 2:
        log.warning(f'Usage: python3 {sys.argv[0]} <host:port>')
        exit(1)

    host, port = sys.argv[1].split(':')
    r = remote(host, int(port))

    r.sendlineafter(b'> ', b'2')  # Start the game
    prog = log.progress('Round')  # Progress tracker

    for round in range(500):
        prog.status(f'{round + 1}')
        r.recvline()  # Skip top border line

        # Parse the maze, stripping border characters and lines
        maze = list(map(
            lambda line: line.split()[1:-1],
            r.recvuntil(b'\n\n').strip().decode().splitlines()
        ))[1:-1]

        # Locate the robot's position
        start_col = maze[0].index('🤖')
        dfs((0, start_col), maze, {(0, start_col)})

        # Send the discovered path
        r.sendlineafter(b'> ', final_path.encode())
        final_path = ''  # Reset path for the next round
        r.recvline()  # Consume result line

    # Final message
    prog.success(f'{round + 1}')
    print(r.recv().decode())
    r.close()


if __name__ == '__main__':
    main()
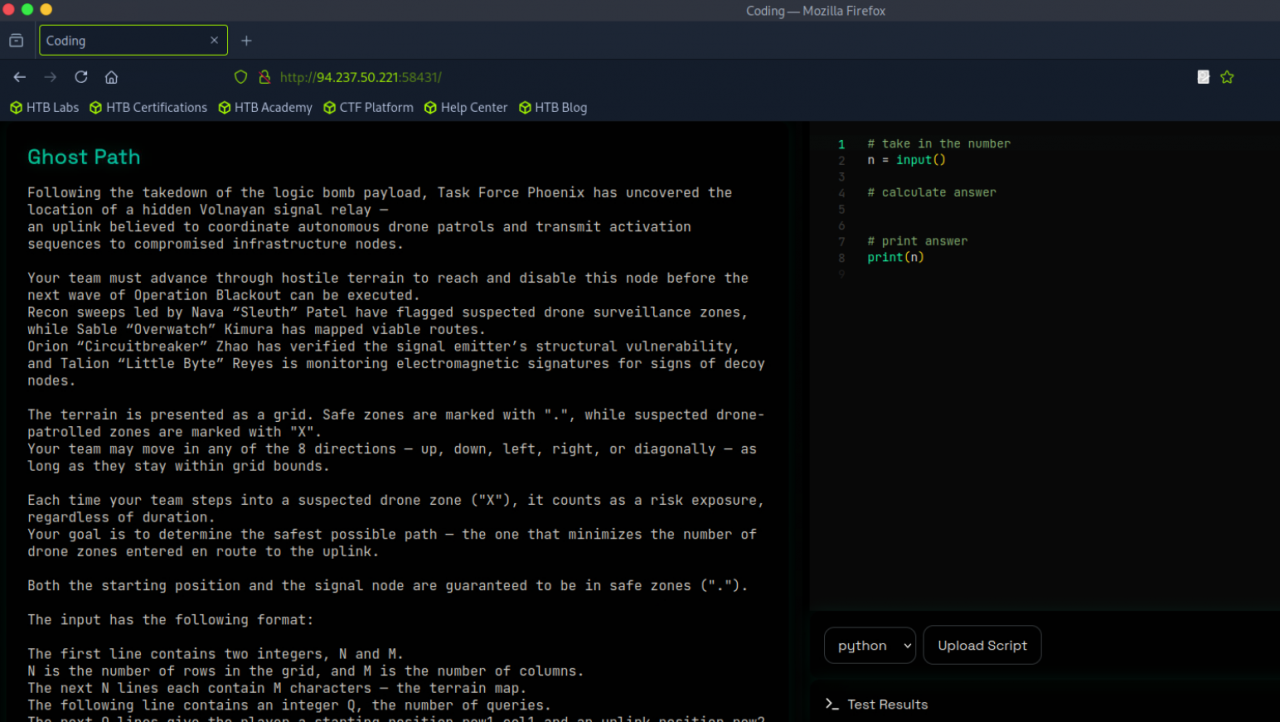
HackTheBox Ghost Path Description
A hidden uplink powering Volnayan drone networks has been located deep in hostile terrain. Your team must navigate the grid to reach and disable it — but every step into a drone-patrolled zone increases the risk of detection. Chart the safest route through the surveillance field, and minimize exposure before the next wave is unleashed.
Walkthrough
We’re given a 2D grid representing terrain with safe zones and drone-controlled zones. The goal is to process multiple queries, each asking for the minimum number of drone zones one must cross to get from a start cell to an end cell.
Step 1: Input Parsing and Initial Setup
Parsing input is the foundation of solving structured problems efficiently.
import sys
from collections import deque

data = sys.stdin

# Read the grid size
N, M = map(int, data.readline().split())

# Read the terrain map (N rows of M characters each)
_map = [list(data.readline().strip()) for _ in range(N)]

# Read the number of queries
Q = int(data.readline().strip())

# Read the query lines
coords = [data.readline().strip() for _ in range(Q)]
_mapholds characters representing each cell (e.g.'0'for safe,'1'for drone zone).- Each query gives two points (start and end). All coordinates are 1-indexed, so we’ll convert them to 0-indexed next.
Step 2: Organize and Convert Query Coordinates
To simplify processing, we define a helper function to convert all query points to 0-indexed format:
def get_start_end_coords(data):
    coords = []
    for d in data:
        x1, y1, x2, y2 = map(int, d.split())
        coords.append(((x1 - 1, y1 - 1), (x2 - 1, y2 - 1)))
    return coords

start_end_coords = get_start_end_coords(coords)
Step 3: Region Tagging with BFS
We now use a BFS-based tagging algorithm to group all connected cells of the same type (safe or drone zone) into distinct regions, each with a unique ID:
def in_bounds(x, y, N, M):
    return 0 <= x < N and 0 <= y < M

def bfs_tag(_map, grid, N, M):
    ID = 1
    for r in range(N):
        for c in range(M):
            if grid[r][c] == -1:
                terrain = _map[r][c]
                queue = deque([(r, c)])
                while queue:
                    x, y = queue.popleft()
                    if grid[x][y] != -1:
                        continue
                    grid[x][y] = ID
                    # Explore all 8 directions
                    for dx, dy in [(-1,0), (1,0), (0,-1), (0,1), (-1,-1), (1,1), (-1,1), (1,-1)]:
                        nx, ny = x + dx, y + dy
                        if in_bounds(nx, ny, N, M) and _map[nx][ny] == terrain and grid[nx][ny] == -1:
                            queue.append((nx, ny))
                ID += 1
    return grid, ID - 1

# Initialize region ID grid
grid = [[-1] * M for _ in range(N)]
grid, maxID = bfs_tag(_map, grid, N, M)
grid[r][c] now contains the region ID for each cell.
Cells of the same terrain type that are connected (in 8 directions) share the same region ID.
Step 4: Build Region Tree for Efficient Path Queries
We model the region-to-region connectivity as a tree, connecting adjacent regions.
LOG = 20  # Enough to handle up to ~1 million nodes

def build_tree(_map, grid, N, M, maxID):
    parent = [0] * (maxID + 1)
    depth = [0] * (maxID + 1)
    up = [[0] * (maxID + 1) for _ in range(LOG)]
    adj = [[] for _ in range(maxID + 1)]
    visited_edges = set()

    # Step 1: Build undirected region adjacency graph
    for r in range(N):
        for c in range(M):
            curr_id = grid[r][c]
            for dx, dy in [(0, 1), (1, 0), (1, 1)]:
                nx, ny = r + dx, c + dy
                if in_bounds(nx, ny, N, M):
                    next_id = grid[nx][ny]
                    if curr_id != next_id:
                        edge = tuple(sorted((curr_id, next_id)))
                        if edge not in visited_edges:
                            adj[curr_id].append(next_id)
                            adj[next_id].append(curr_id)
                            visited_edges.add(edge)

    # Step 2: BFS to determine parent and depth
    queue = deque([1])
    visited = [False] * (maxID + 1)
    visited[1] = True
    while queue:
        u = queue.popleft()
        for v in adj[u]:
            if not visited[v]:
                parent[v] = u
                depth[v] = depth[u] + 1
                visited[v] = True
                queue.append(v)

    # Step 3: Preprocess binary lifting table
    for v in range(1, maxID + 1):
        up[0][v] = parent[v]
    for k in range(1, LOG):
        for v in range(1, maxID + 1):
            up[k][v] = up[k-1][up[k-1][v]]

    return depth, up

depth, up = build_tree(_map, grid, N, M, maxID)
Step 5: Lowest Common Ancestor (LCA) to Measure Region Distances
We use binary lifting to find the Lowest Common Ancestor of two regions efficiently:
def lca(u, v, depth, up):
    if depth[u] < depth[v]:
        u, v = v, u
    for k in reversed(range(LOG)):
        if depth[u] - (1 << k) >= depth[v]:
            u = up[k][u]
    if u == v:
        return u
    for k in reversed(range(LOG)):
        if up[k][u] != up[k][v]:
            u = up[k][u]
            v = up[k][v]
    return up[0][u]
This function allows us to compute the distance between two regions in logarithmic time.
Step 6: Solve Each Query
Using the region depth and LCA, we can now answer each query in constant time:
output = []
for (sx, sy), (ex, ey) in start_end_coords:
    id1 = grid[sx][sy]
    id2 = grid[ex][ey]
    ancestor = lca(id1, id2, depth, up)
    dist = (depth[id1] + depth[id2] - 2 * depth[ancestor]) // 2
    output.append(str(dist))

print("\n".join(output))
Why divide by 2?
We only need to count drone zones crossed. Since transitions between regions alternate between safe and drone zones, and the start/end are guaranteed to be safe, half the steps will be in drone zones.